Zapier is an online platform that helps you automate workflows by connecting the apps and services you use. This allows you to automate tasks without having to build this integration yourself, or hiring someone to build this integration for you.
LeadCentre.AI integrates with Zapier to push leads to other CRM using Zapier. To integrate with Zapier, you need to generate an access token from the LeadCentre.AI user interface.
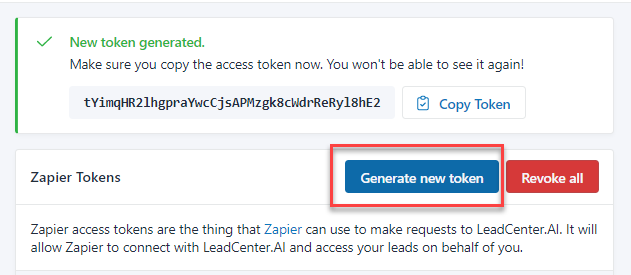
Zapier access tokens are the thing that Zapier can use to make requests to LeadCenter.AI. It will allow Zapier to connect with LeadCenter.AI and access your leads on your behalf of you.
Configuring Access Token
To configure the access token, do the following:
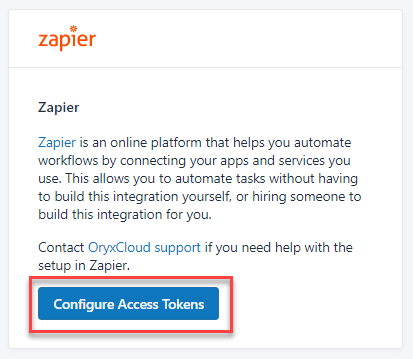
On the LeadCenter.AI, go to Setup > Integration All the LeadCentre.AI, related integrations are displayed.
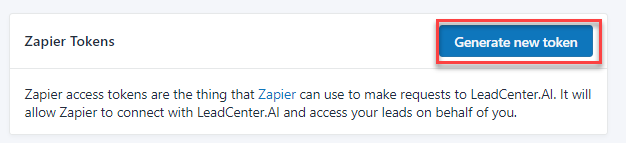
On the Zapier section, click on Configure Access Tokens button. The Zapier Tokens page is displayed.
To generate the access token, click on Generate new token button.
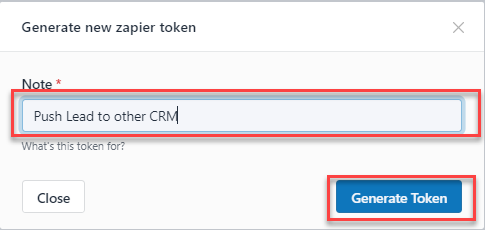
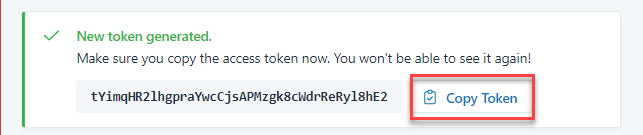
Enter the note and click on Generate Token button. A new token will be generated.
To copy the token click on Copy Token button. Note: Ensure that you copy the access token, as you will not be able to access it later.
[OPTIONAL]To generate a new token again, click Generate new token.
Revoking Access Token
To revoke the access token, do the following:
On the LeadCenter.AI, go to Setup > Integration
On the Zapier section, click on Configure Access Tokens button.
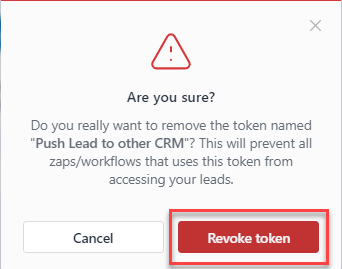
Click on the Revoke button to revoke an access token A confirmation message will be displayed.
Click on the Revoke token button in the confirmation message to revoke the access token. A success message will be displayed.
LeadCenter.AI External Forms are the forms that are created to integrate 3rd Party forms. To configure the external forms firstly you need to register your domain website with LeadCenter.AI to track browsing history and secondly register the form in your website in LeadCentre.AI by creating the external forms.
Registering a New Domain
To register a new domain, do the following:
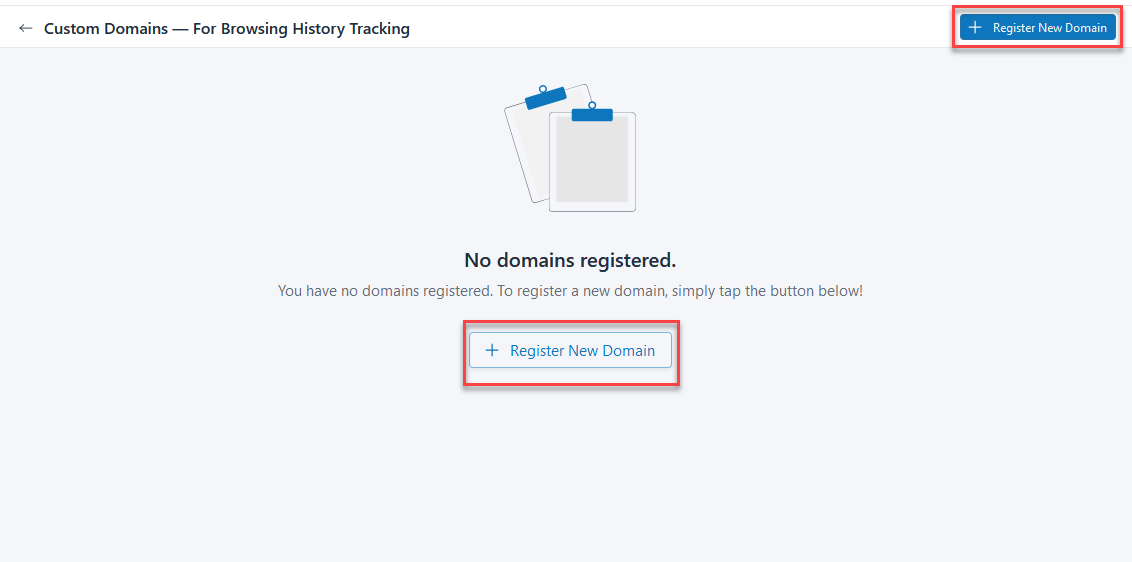
On the LeadCenter.AI, go to Setup > Lead Capturing > Custom Domains
Click on the Register New Domain button
Enter the domain name and click on Register New Domain. Note: Domain name without HTTP or HTTPS prefix
The new domain will be registered and will be listed on the Custom Domain page.
To integrate the newly registered domain with LeadCentre.AI, click How to integrate? button.
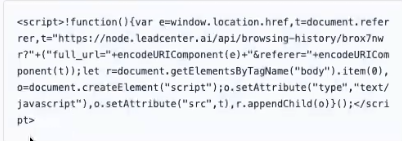
Copy the Javascript code that is shown in the popup and on your website paste the code at the bottom of the page, just before the closing of the body tag. Javascript Code Example:
Log in to your website and include the copied code on all pages as a header. There are multiple ways to do this. See: How to easily add javascript to WordPress pages and posts. Once it is completed, your browsing history tracking should be started. For now, you can verify it by checking the browsing_history table manually.
To deactivate the new domain click on Deactivate button.
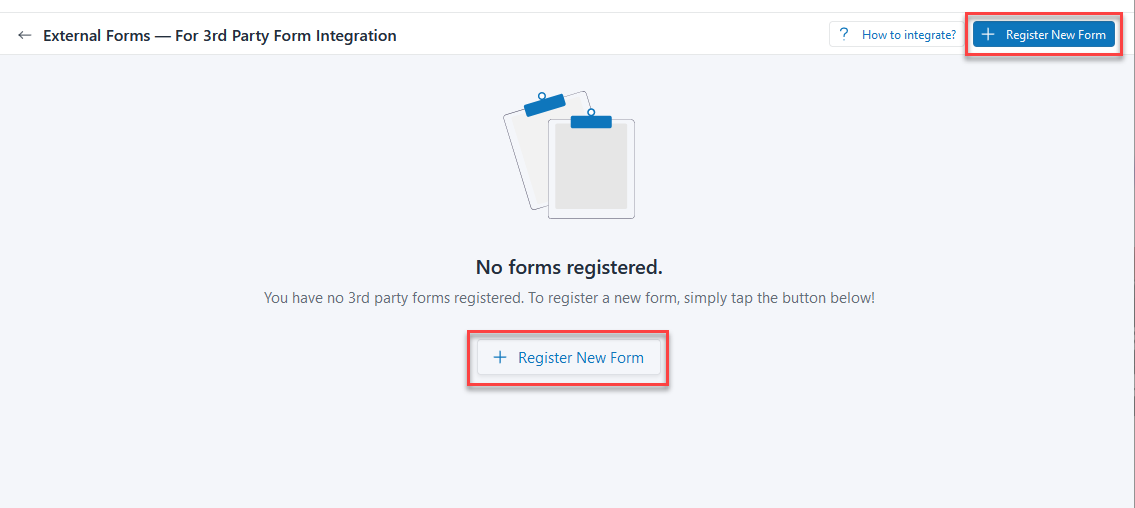
Registering an External Form(for your Website in LeadCenter.AI)
To register a new external form, do the following:
On the LeadCenter.AI, go to Setup > Lead Capturing > External Forms
Click on the Register New Form button
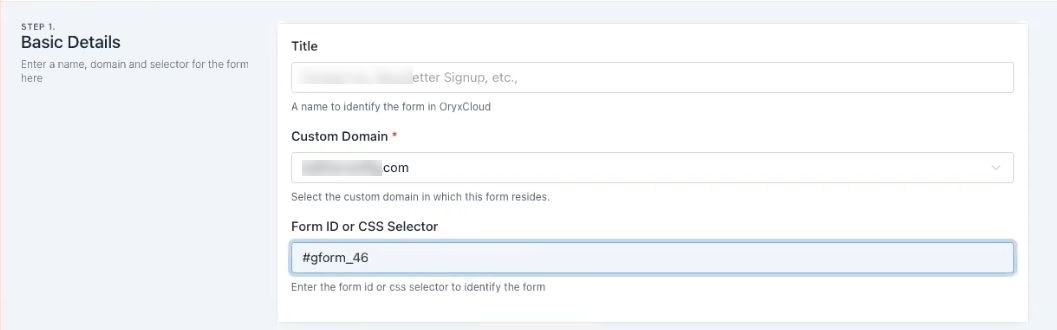
In Step 1, in the Basic Details section enter the following fields:
Title – Enter a name to identify your form in LeadCenter.AI
Custom Domain – Choose the domain registered Registering a New Domain section.
Form ID or CSS Selector – Enter the unique form ID or CSS selector to identify the form. Example for unique form ID:
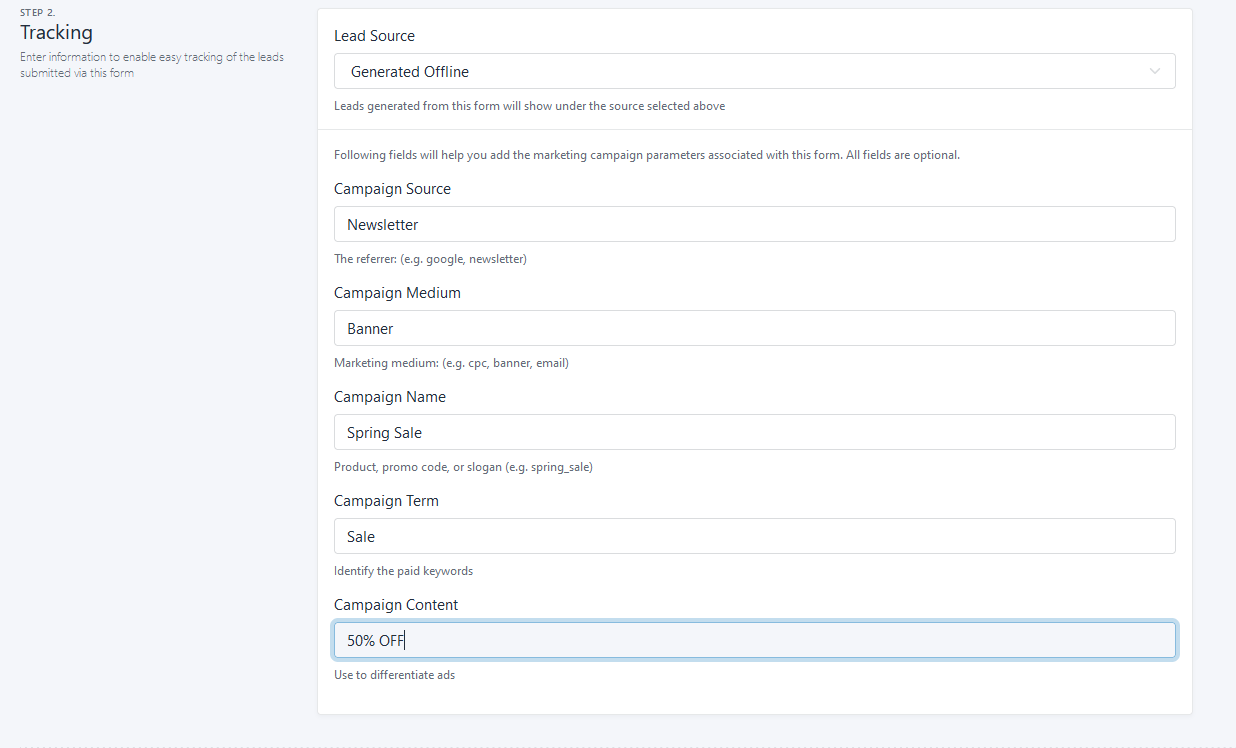
In Step 2, in the Tracking section enter the following fields:
Field
Actions
Lead Source
Choose the Leads generated which will show under the source selected.
Campaign Source
Enter the campaign source for example; google, newsletter etc.
Campaign Medium
Enter the marketing medium for example; CPC, banner, email etc.
Campaign Name
Enter a campaign name like the Product, promo code, or slogan (e.g. spring_sale).
Campaign Term
Enter a campaign term to identify the paid keywords.
Campaign Content
Enter campaign content to use for differentiating ads.
In Step 3, Review & Save section, review it and click Save Changes.
Your new form will be registered and will be displayed on the External Form page.
To integrate, click How to integrate? button
Copy the Javascript code from the popup
Log in to your website and include the copied code on all pages as a header. There are multiple ways to do this. See: How to easily add javascript to WordPress pages and posts. Once done, your form submissions will be displayed in the LeadCenter.AI
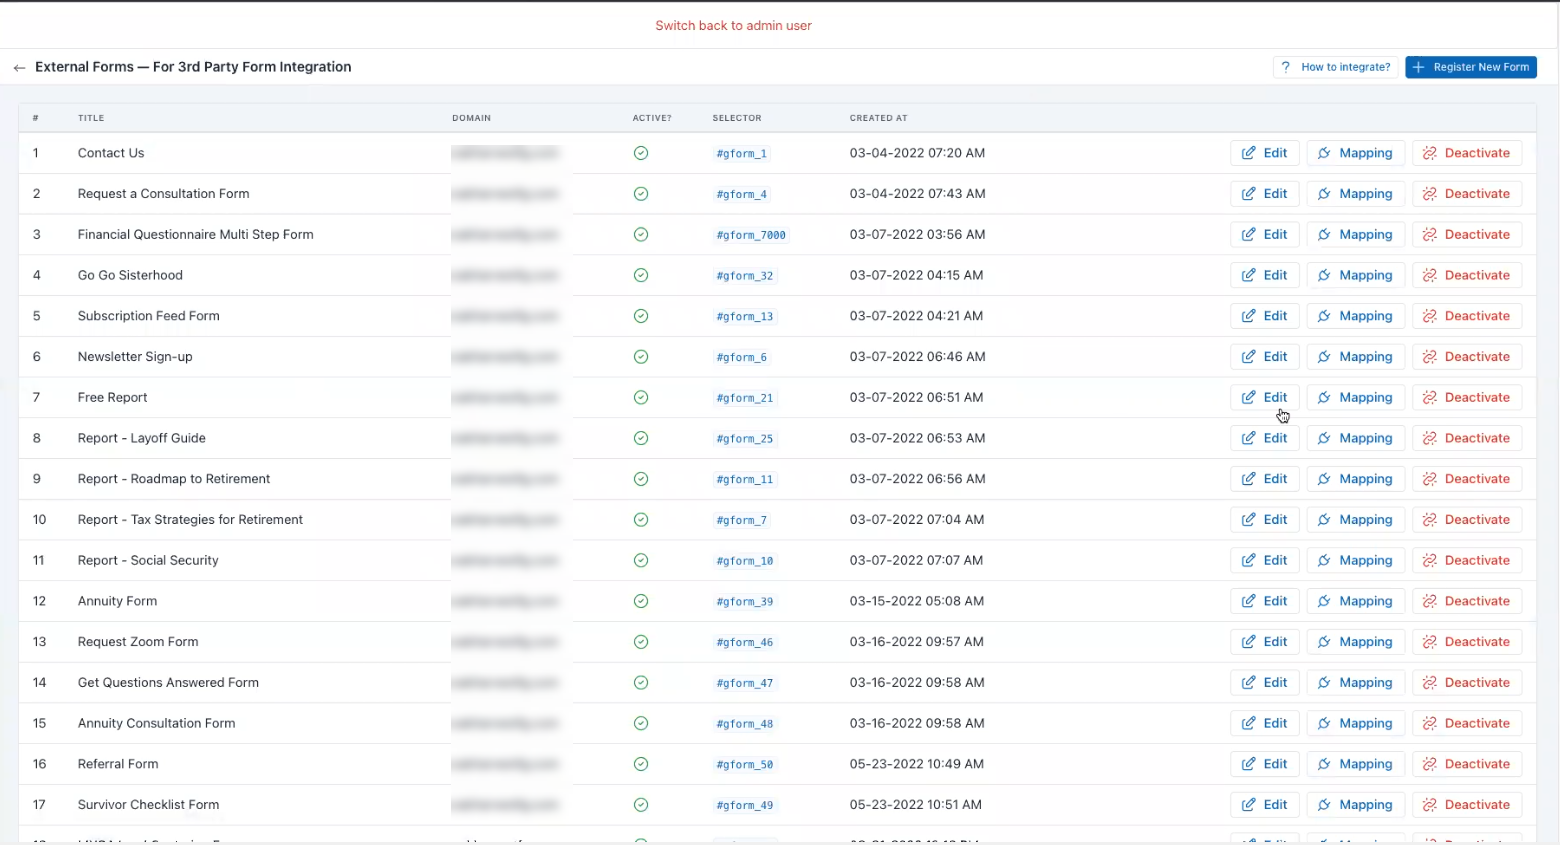
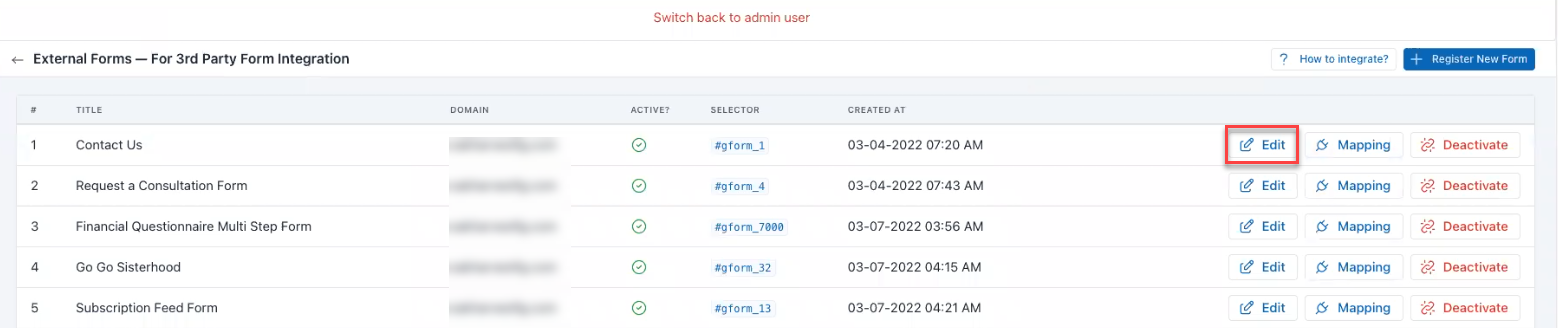
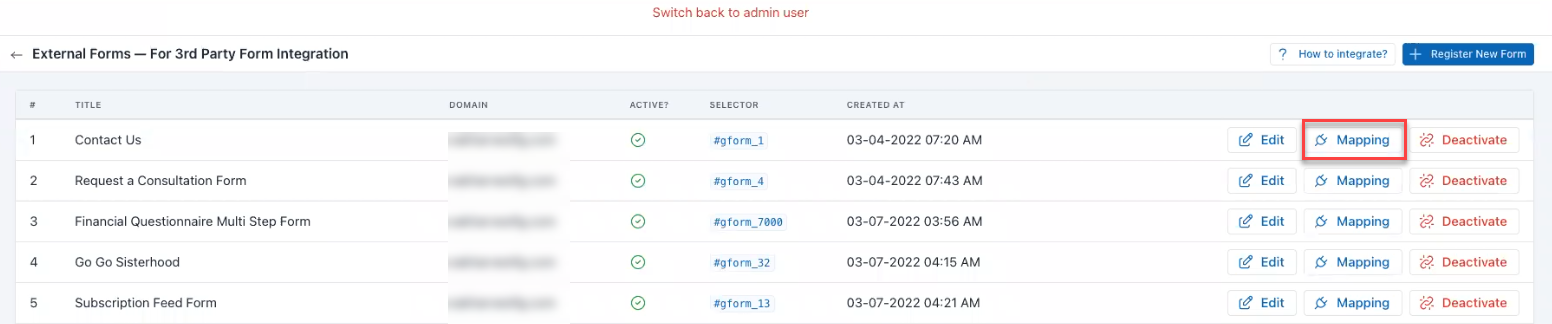
Managing an External Form
To manage external forms, do the following:
On the LeadCenter.AI, go to Setup > Lead Capturing > External Forms
To edit the external form,
Choose the external form to be edited and click on Edit
Edit the form and click Save Changes.
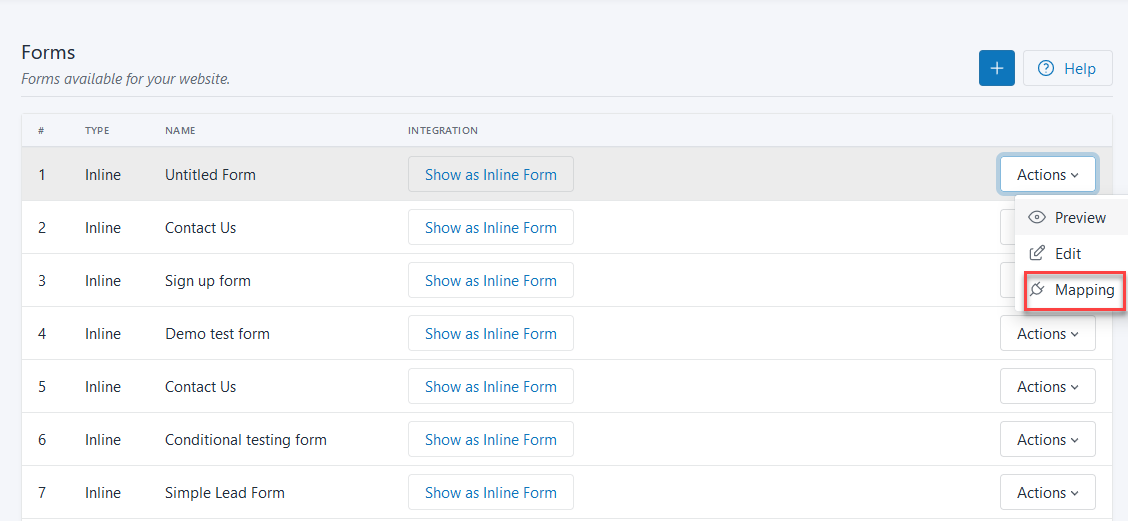
To map the external form,
Choose the external form to be edited and click on Mapping
Edit the mapping-related changes and click Save Changes.
To deactivate the external form, choose the external form to be edited and click on Deactivate
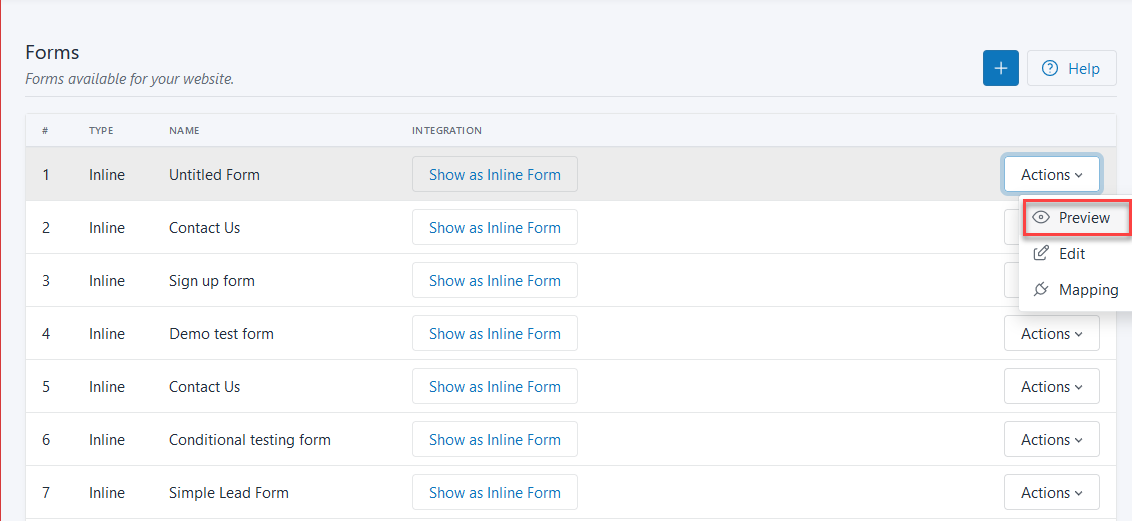
LeadCenter.AI comes with a list of inbuilt inline and modal forms which are mostly used to receive leads from custom forms. You can also add new forms from the Lead Capturing > Forms page, by clicking on the plus button.
Previewing a Form
To preview a form do the following:
On the LeadCenter.AI, go to Setup > Lead Capturing > Form Builder
Go to Actions and click on Preview
It will display a preview of the selected form.
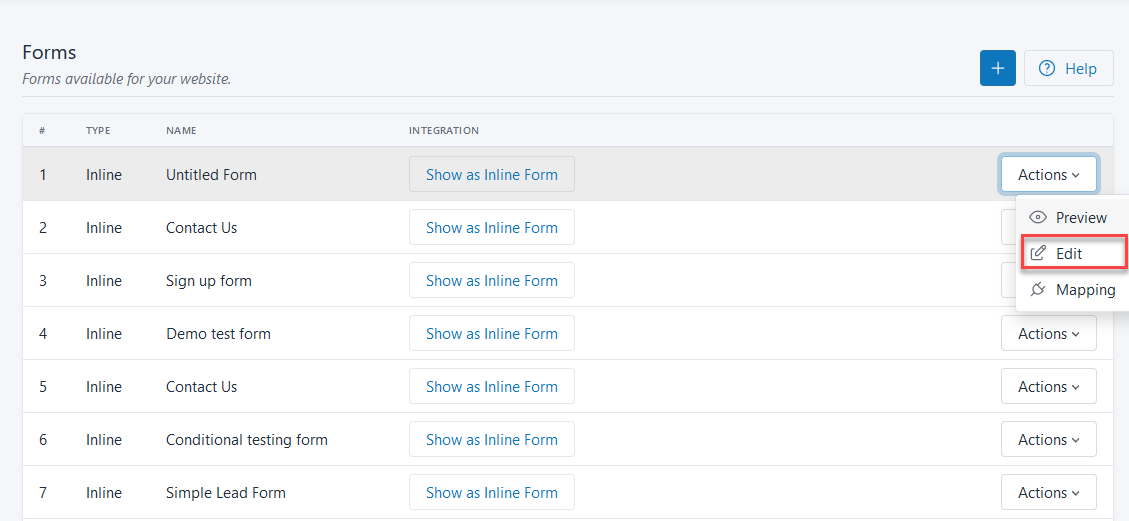
Editing a form
To edit a form do the following:
On the LeadCenter.AI, go to Setup > Lead Capturing > Form Builder
On the LeadCenter.AI, go to Setup > Lead Capturing > Form Builder
Go to Actions and click on Mapping
You can map the selected form.
How to Embed a Form in an External Site
LeadCenter.AI consists of inline and modal forms, that have a script that can be embedded into an external site. For more details on inline and modal forms see Types of Forms.
To embed a script into an external form, do the following:
On the LeadCenter.AI, go to Setup > Lead Capturing > Form Builder
Based on the type of form, there are 2 ways to embed it with the external form.
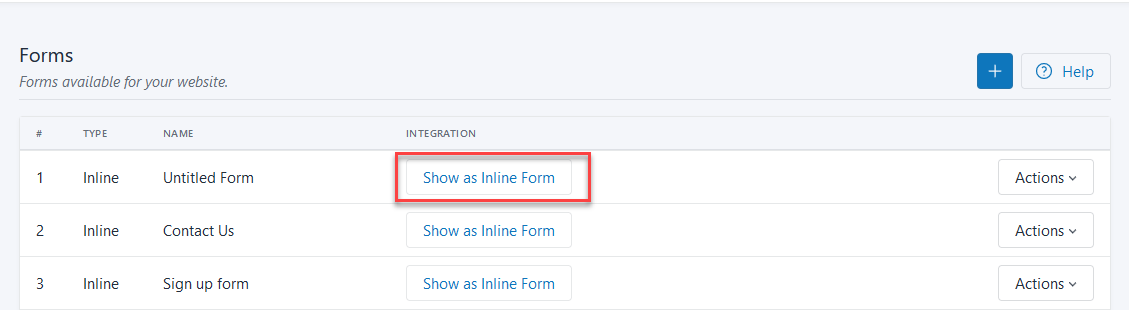
For Inline Form
Click on the button Show as Inline Form to get the popup
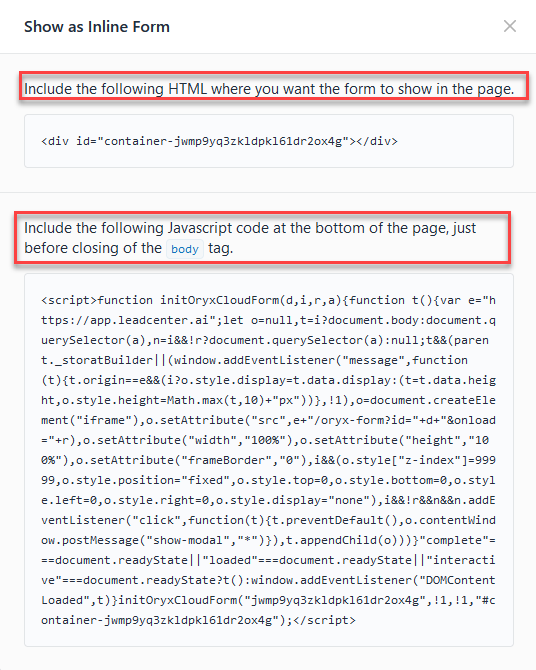
The Show as Inline Form popup is displayed.
Copy the HTML code and go to your website and paste the code where you want your form to appear as inline. HTML Code Example:<div id="containerv5zp4goj3r026zldyx8ek1wm"></div>
Copy the Javascript code and go to your website and paste the code in the header of the page where you pasted the HTML code, just before the closing of the body Javascript Code Example:
For Modal Form
Click on the button Show as Inline Form to get the popup
Show on Button/Link
Click on the button Show on Button/Link Click to get the popup
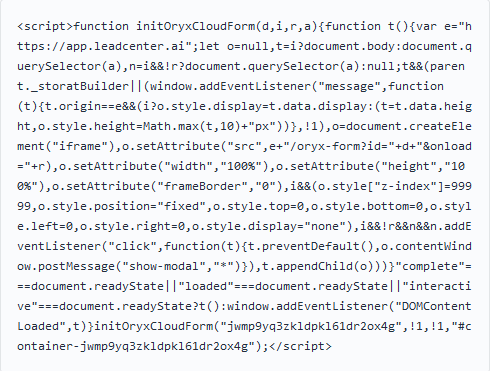
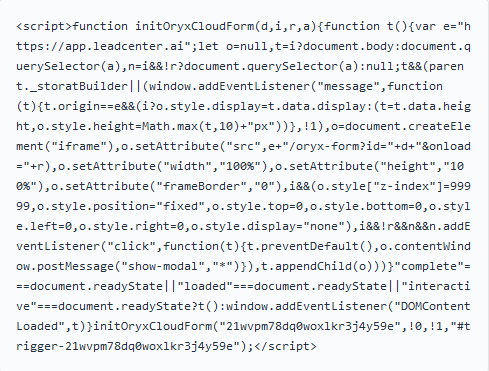
Copy the value of the id attribute of the link or button tag to "trigger-q4521xz8v90mq9lj3rdyp7kw" for the form to show on click. For, example: <a id="trigger-21wvpm78dq0woxlkr3j4y59e">Click Me</a>
Copy the Javascript code and go to your website and paste the code at the bottom of the page, just before the closing of the body Javascript Code Example:
Show on Page Load
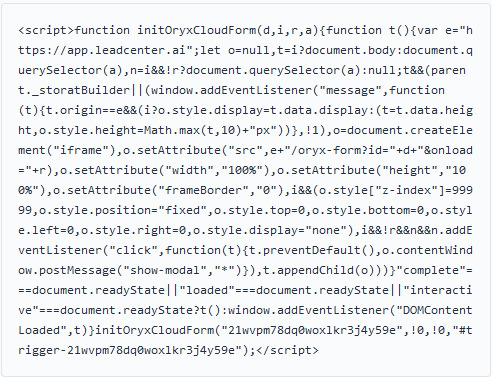
Click on the button Show on Page Load to get the popup
Copy the Javascript code and go to your website and paste the code at the bottom of the page, just before the closing of the body Javascript Code Example:
A Call Redirect (Virtual Phone Number) is used to redirect calls to your cell phone or landline, from a particular landing page through a source which for example can be Google Ads, Facebook Ads, etc. A Virtual Phone Number is useful in terms of trackability, security, mobility, and simplicity for your business.
Virtual Phone Number (Call Redirect)
Each source is assigned to a Virtual Phone Number so that whenever you receive a call through the Google Ads landing page (where the Virtual Phone Number is provided) it helps to identify the source, for example, here the Lead Source is Google Ads. The Virtual Phone Number (Calls Redirect) page displays the Lead Source, Assigned Virtual Number, and Action column. From this page, you can request for a Virtual Number to be generated and assigned for a particular source.
Configuring a Virtual Phone Number
To configure a Virtual Phone Number do the following:
Click on Setup The LeadCenter.AI SETUP page is displayed.
Go to Leads > Calls Redirect The Virtual Phone Number (Calls Redirect) page is displayed.
Click on or to request a new Virtual Phone Number
A message that a request for a Virtual Number is being sent will be displayed.
To cancel an assigned Virtual Number click The assigned Virtual Number will be canceled.
An Email Redirect (Leads by Email) is used to forward leads to your lead management dashboard automatically using your lead source’s unique Email ID. The Email Redirect (Leads by Email) page displays the Lead Source, Assigned Email, and Action column. From this page, you can request for an Email ID to be generated for forwarding emails.
Click on Setup The LeadCenter.AI SETUP page is displayed.
Go to Leads > E-mails Redirect The E-mails Redirect page is displayed.
Click to generate a unique E-mail ID for forwarding emails
A unique E-mail ID will be generated and assigned for the particular lead source. A successful message will be displayed.
To copy E-mail ID you can click on
This section describes setting the lead sources.
There are various platforms like email marketing, campaigning, social media platforms, calls, etc, through which lead sources can be generated. A lead source can best be defined as the original point at which a customer first hears about you. It’s the first step in your lead funnel and ground zero for your relationship with your customers.
By default From Website Forms and Generated Offline are displayed.
From Website Forms : This source is for those leads which are being generated via submitting website forms in the website.
Generated Offline : This source is for those leads which are being generated offline.
Click on Setup The Orxy Cloud SETUP page is displayed.
Go to Leads > Sources The Lead Sources page is displayed.
Click on Add New Source icon
Add the following details Name : Enter the name of the new source Color : Choose the color for the source from the given range of colors Icons : Choose the icon for the new source
Click on Add New Source button to add the newly added source. The new source will be added to the existing source list. You have successfully added a new source.
Click on Setup The Orxy Cloud SETUP page is displayed.
Go to Leads > Sources The Lead Sources page is displayed.
Select the source to be modified and click Edit
Modify the source details and click on Save Changesbutton You have successfully modified the source.
A lead medium can best be defined as the way the lead arrived at the LeadCenter.AI Lead Management System. Each Source can be assigned one medium of a different type. For example, if you create a Source called Google Ad, you can assign a Virtual Phone number, Email redirect Account, and Website Form to that Source.
The supported mediums are: No operation is supported on the Lead Medium page.
Email Redirect: Email redirect lets you forward leads to your lead management dashboard automatically using your lead source’s unique email id.
Phone Redirect: Phone redirect lets you connect to a Virtual Phone Number that offers trackability, security, mobility, and simplicity for your business. You need to get a business telephone number that routes to your cell phone or landline.
Website Forms: Website Forms are those forms available for your website.
Offline: Offline mediums are those lead connections that you get from a phone call, reference, etc.
Chat: Chat medium lets you connect to a lead on a chat on the phone, social media, etc.
Zapier: Zapier connects with leads via the web apps than anyone. It is integrated with apps such as Facebook Lead Ads, Slack, Quickbooks, Google Sheets, Google Docs.


 No operation is supported on the Lead Medium page.